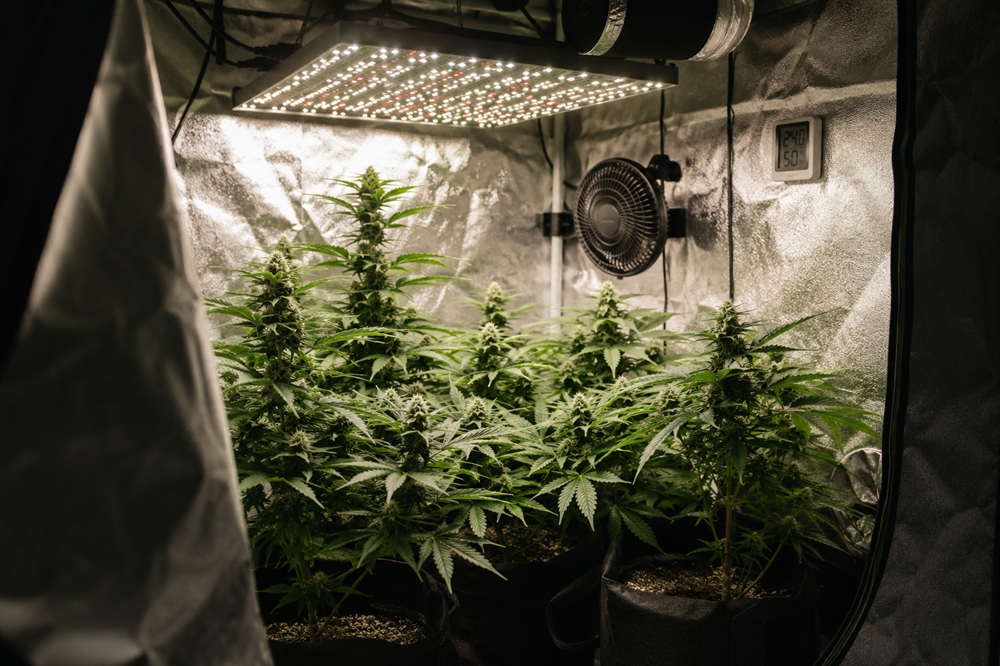
How to Grow Cannabis Indoors: A Beginner’s Guide to a Safe Home Grow
Growing cannabis indoors gives you control over light, temperature, airflow, moisture, and plant nutrition throughout the year. It can also protect plants from severe weather and some outdoor pests.
That control comes with responsibility. Indoor cultivation combines electrical equipment, water, heat, humidity, odor, and a plant that remains restricted or prohibited in many places. A successful grow therefore begins with legal research and a safe, manageable setup.
This guide explains the main stages of growing cannabis indoors for adults who live where personal cultivation is legally permitted. It focuses on practical beginner decisions rather than advanced techniques intended to maximize production.
Check Whether Growing Cannabis at Home Is Legal
Cannabis possession and home cultivation are governed by different rules. A jurisdiction may allow adults to possess cannabis while continuing to prohibit unlicensed growing.
Before buying seeds, plants, or equipment, confirm:
- Whether personal cultivation is permitted
- The minimum age for home growers
- The number of plants allowed per person or household
- Whether plants must be hidden from public view
- Whether the growing space must be locked or secured
- How much harvested cannabis may be stored
- Whether medical registration is required
- Where seeds or immature plants may legally be obtained
State, provincial, or territorial law may not be the only authority involved. Municipal bylaws, zoning rules, fire codes, electrical requirements, leases, condominium rules, and homeowners association policies may also apply. Health Canada’s home cultivation safety guidance, for example, advises growers to check local zoning, fire, electrical, inspection, and remediation requirements.
Use current government information for your location rather than relying on forum posts or an article written for another jurisdiction.
Plan the Indoor Growing Space
A small, controlled space is usually easier for a beginner to manage than an entire room. Common options include a grow tent, a converted cabinet, a suitable closet, or a dedicated spare room.
Grow tents are popular because they create a defined area for lighting, ventilation, and spill protection. A closet or cabinet may also work, but only when it has safe electrical access and a reliable way to exchange air.
Evaluate a possible location based on:
- Floor space and available height
- Access to fresh air
- A route for warm, humid air to leave
- The capacity and condition of the electrical supply
- Floor protection and drainage
- Surfaces that are easy to clean
- Enough room to reach and inspect every plant
- Protection from children, pets, and unauthorized visitors
Remember to account for the height of the containers, mature plants, lighting fixture, and the safe distance required between the light and the canopy.
Avoid areas with existing dampness, exposed wiring, difficult-to-clean carpeting, or large temperature swings. Basements, attics, and garages may appear convenient, but their conditions can change substantially with the weather.
Essential Equipment for an Indoor Cannabis Grow
A beginner does not need every device marketed to cannabis growers. Start with equipment that provides light, air exchange, environmental monitoring, drainage, and electrical safety.
Grow Light
Choose a plant light that matches the dimensions of the growing area. A fixture that is too small may produce weak or stretched growth, while an oversized light can waste electricity and create excess heat.
Secure the fixture with hardware rated for its weight. The mounting system should allow its height to be adjusted as the plants grow.
Timer
An automatic timer keeps the daily light period consistent. This is particularly important for photoperiod-sensitive plants, which respond to changes in the length of the light and dark periods.
Use a timer rated for the electrical load of the fixture rather than one designed only for a small household lamp.
Exhaust and Intake
An exhaust fan removes warm, humid air from the growing area. Replacement air can enter through passive openings or through a separate intake fan.
The ventilation system should exchange air without producing excessive vibration, noise, or strong negative pressure inside a tent.
Circulation Fan
A circulation fan moves air around and through the plants, reducing stagnant pockets within the canopy.
Use indirect, gentle airflow. Leaves may move slightly, but they should not remain bent or shaken by a powerful stream of air.
Temperature and Humidity Monitor
Use a thermometer and relative humidity monitor at plant height. A device that records daily minimum and maximum readings is useful because conditions may change significantly after the light switches off.
A humidifier, dehumidifier, heater, or air conditioner should be added only when measurements show that one is needed.
Containers and Drainage Trays
Every container needs drainage openings. Place waterproof trays or another protective barrier beneath the plants so runoff cannot damage the floor or reach electrical equipment.
Choose containers that leave enough room for watering, inspection, and air circulation. Filling a small tent with oversized pots can make ordinary care unnecessarily difficult.
Odor Filter
A carbon filter connected to the exhaust system can reduce odor before air leaves the growing space. It may be especially useful in apartments, attached homes, or areas with odor restrictions.
Filters gradually lose effectiveness and must eventually be replaced.
Choose Seeds or Clones
Cannabis can be started from seed or from clones, which are rooted cuttings taken from established plants.
Regular Seeds
Regular seeds may produce male or female plants. Growers seeking unfertilized female flowers must identify and separate pollen-producing plants before pollination occurs.
This additional identification step can make regular seeds less convenient for a first grow.
Feminized Seeds
Feminized seeds are produced to develop predominantly into female plants. They reduce the likelihood of using space and resources on unwanted male plants, although biological outcomes should never be considered completely infallible.
Autoflowering Seeds
Autoflowering plants begin flowering primarily according to age rather than a conventional switch to shorter days.
They are often compact and relatively quick to complete their life cycle. However, early stress can be difficult to correct because the vegetative period cannot simply be extended.
Photoperiod Seeds
Photoperiod-sensitive plants remain in vegetative growth under long days and begin flowering after the daily light period is shortened.
They give the grower more control over plant size and timing, but they require a consistent dark period during flowering.
Clones
A clone has the same genetics as its parent plant, making some growth characteristics more predictable.
Clones can also bring insects, fungal spores, or plant diseases into a clean growing area. Inspect incoming plants closely and keep them separated from established plants until their condition is clear.
Whatever starting material you choose, obtain it only from a source that is lawful in your jurisdiction.
Select a Growing Medium
The growing medium supports the roots and influences how water, oxygen, and nutrients reach the plant.
Container Mix
A quality container mix is often the most forgiving choice for a beginner. It retains some moisture while allowing excess water to drain.
Do not use ordinary yard soil in an indoor container. It may compact, drain poorly, or introduce insects, weed seeds, and plant pathogens. Use a loose mix intended for container growing.
Soilless Mix
Soilless media may contain coco coir, peat, perlite, or similar materials. They can provide strong drainage and root aeration but may contain few nutrients of their own.
Watering, fertilizer concentration, and root-zone pH generally require closer attention than they do in a well-buffered container mix.
Hydroponics
Hydroponic systems grow plants without conventional soil. Roots may be supported by an inert medium or exposed directly to an aerated nutrient solution.
These systems can offer precise control, but they also introduce reservoirs, pumps, water chemistry, and the possibility of rapid changes when equipment fails. A soil-based or soilless container mix is generally simpler for a first grow.
Test the Setup Before Planting
Assemble and operate the complete grow space before introducing seeds or clones. Run the light, exhaust fan, circulation fan, timer, and environmental monitor through at least one complete light and dark cycle.
During the test, check:
- The highest temperature while the light is on
- The lowest temperature after the light switches off
- How humidity changes during the dark period
- Whether fresh air can enter easily
- Whether warm air leaves the enclosure
- Whether the timer operates correctly
- Whether plugs, timers, or power strips become warm
- Whether condensation develops on nearby surfaces
- Whether water could reach electrical connections
Testing is particularly important in a grow tent because closing its doors can change air pressure, heat, and humidity. Correct problems while the area is still empty and easy to rearrange.
Understand the Cannabis Growth Cycle
Germination
Germination begins when a viable seed absorbs moisture and produces its first root. The seed needs consistent moisture, but it should not remain submerged or sit in saturated material.
Handle the emerging root as little as possible because it is easily damaged.
Seedling Stage
After emerging, the seedling develops its first leaves and begins establishing its root system.
Seedlings are vulnerable to overwatering, concentrated fertilizer, excessive heat, and overly intense light. Maintain gentle, stable conditions while the roots develop.
Vegetative Stage
During vegetative growth, the plant produces roots, stems, branches, and foliage. This stage establishes much of its eventual size and structure.
Photoperiod plants can remain vegetative while they receive long days, although the practical duration is limited by the available room.
Pre-Flowering
Mature plants begin showing early reproductive structures where branches meet the main stem.
For growers using regular seeds, this is when plant sex becomes easier to identify. Pollen-producing plants must be separated before they can fertilize female plants.
Flowering Stage
During flowering, female plants direct increasing energy toward flower development. Many plants stretch rapidly during the early part of this stage before vertical growth slows.
Flowers and surrounding foliage become denser as maturity approaches. The interior of the canopy should be checked regularly for dampness, pests, and damaged tissue.
Maturity
The flowering period supplied by a breeder is an estimate rather than a guaranteed harvest date. Genetics, light, temperature, plant health, and previous stress can all affect the schedule.
Evaluate the actual plant instead of harvesting automatically when a certain number of weeks has passed.
Manage Light, Temperature, Humidity, and Airflow
Environmental needs vary by cultivar, growing medium, light intensity, and stage of development. The following figures are general starting points, not rigid targets.
| Growth stage | Common photoperiod | General temperature range | General relative humidity range |
|---|---|---|---|
| Seedling | 16–18 hours of light | 22–26°C | 65–75% |
| Vegetative | About 18 hours of light | 22–28°C | 50–65% |
| Flowering | Commonly 12 hours of light and 12 hours of darkness | 20–26°C | 45–60% |
Cannabis cultivars do not all respond identically. Controlled studies have used a variety of temperature and humidity settings, and photoperiod research has shown that some cultivars can flower under days longer than 12 hours. Even so, a 12-hour light and 12-hour dark schedule remains a dependable conventional starting point for flowering photoperiod-sensitive plants.
Autoflowering plants do not require a switch to a 12-hour day to begin flowering.
Keep the Dark Period Consistent
Prevent light from entering the enclosure during the flowering dark period. Check tent seams, equipment indicator lights, nearby windows, and doors that may be opened unexpectedly.
Check Conditions After the Light Turns Off
Relative humidity often rises as the room cools. Review the monitor’s minimum and maximum readings rather than checking conditions only while the light is on.
If humidity rises sharply overnight, increase air exchange or use an appropriately sized dehumidifier.
Maintain Air Movement Through the Canopy
Check the air inside and below the foliage rather than judging circulation only from the leaves closest to the fan.
Dense areas may require repositioning a fan or creating more space between plants, but airflow should remain gentle.
Water, Feed, and Inspect the Plants
Water According to the Growing Medium
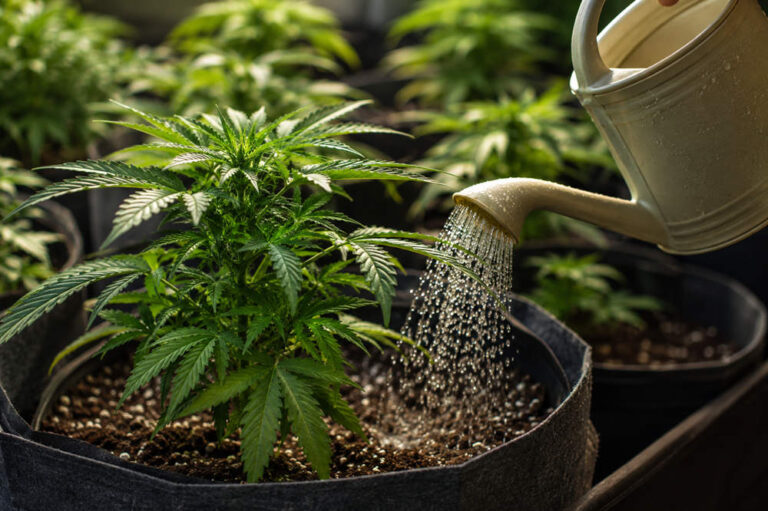
Do not water only because a certain number of days has passed. Check the moisture in the medium and learn how the container feels when it is wet and when it is ready for more water.
Water should move evenly through the root zone and drain from the bottom. Empty trays when runoff remains in them.
A continuously saturated medium limits oxygen around the roots. Severe dryness can cause the medium to shrink away from the container and resist even rewetting.
Use Nutrients Conservatively
Cannabis requires essential mineral nutrients, but excessive fertilizer can damage roots and create symptoms that resemble a deficiency.
Use a nutrient product suited to the selected medium. Follow its directions, begin cautiously, and observe the plant before increasing the concentration.
Avoid using several corrective products at once. Changing one variable at a time makes it easier to understand the plant’s response.
Understand pH and Alkalinity
pH affects the availability of nutrients around the roots. It is particularly important in hydroponic and lightly buffered soilless systems.
Penn State Extension’s hydroponic plant nutrition guidance explains that relatively small pH changes can substantially affect nutrient availability.
Water alkalinity also matters because it determines how strongly the water resists a change in pH. Two water sources can have similar pH readings but behave differently in a growing medium.
Do not repeatedly add pH-adjusting chemicals to a buffered container mix without evidence of a problem. If unexplained nutrient symptoms continue, test the irrigation water and root-zone conditions before adding more fertilizer.
Inspect Every Plant Regularly
Several times a week, examine:
- New growth
- Upper and lower leaf surfaces
- Branch joints and stems
- The surface of the growing medium
- Container edges
- Drainage trays
Look for insects, webbing, sticky residue, spots, distorted growth, damaged tissue, unusual odors, or standing water.
Remove fallen leaves and clean spills promptly. Keep short records of watering, feeding, temperature, humidity, and visible changes.
Troubleshoot Common Indoor Growing Problems
Many plant symptoms have more than one possible cause. Review the growing medium, recent care, and room conditions before applying a treatment.
The Plant Droops While the Medium Is Wet
The roots may have remained wet for too long. Check for blocked drainage openings, standing runoff, or compacted growing material.
Allow the medium to dry appropriately before watering again.
The Plant Droops While the Medium Is Dry
The plant may need water, especially when the container feels unusually light.
Apply water gradually. Severely dry material may allow water to run down the sides of the pot without moistening the center of the root zone.
The Upper Leaves Are Pale, Curled, or Dry
Damage concentrated near the top of the plant may indicate excessive light intensity or canopy heat.
Adjust the fixture gradually. Existing damaged tissue may not recover, so judge improvement by the condition of new growth.
Leaf Tips Turn Brown After Feeding
Brown tips that appear soon after fertilizer use can indicate excessive nutrient concentration.
Review the product measurements before feeding again. Do not add another product in an attempt to correct the first one.
Older Leaves Turn Yellow
Some older leaves naturally decline as the plant develops, particularly later in flowering. Rapid or widespread yellowing may instead involve watering, root health, nutrition, or root-zone pH.
Consider the overall pattern rather than diagnosing the plant from a single leaf.
Growth Slows Without a Clear Cause
Review the basics first:
- Root-zone moisture
- Temperature and humidity
- The light schedule
- Air exchange
- Container size
- Recent fertilizer changes
- Signs of pests
Correct an obvious environmental problem before searching for an uncommon nutrient deficiency.
The Room Smells Damp or Musty
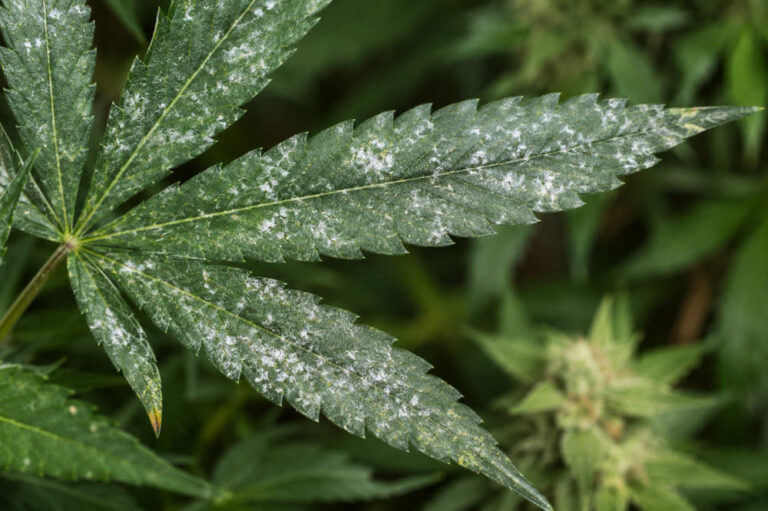
A musty smell can indicate persistent moisture or hidden mold. Inspect walls, windows, trays, ducts, the bottoms of containers, and dense plant material.
The EPA identifies moisture control as the key to mold control. Remove affected material and correct the moisture source instead of covering the odor.
Small Insects or Webbing Appear
Separate the affected plant when practical and identify the pest before selecting a treatment.
Inspect nearby houseplants, new clones, tools, and growing media as possible sources. Use only treatments that are legal and labeled for the plant and intended use.
Control Odor, Moisture, and Household Hazards
Direct Exhaust Air Appropriately
Do not vent warm, humid air into an attic, wall cavity, crawl space, or another enclosed part of the building. Moisture may condense on hidden surfaces and cause damage.
Use an exhaust route that complies with local rules and does not create an odor problem for neighboring properties.
Respond to Condensation
Water collecting on windows, pipes, walls, or ceilings indicates that moist air is reaching a cool surface.
Improve ventilation or dehumidification and dry the affected area. Wiping away the water without correcting the humidity allows it to return.
Keep Electrical Connections Away From Water
Mount plugs, timers, power strips, and connections above floor level. Arrange cables so water cannot travel along them toward an outlet.
Avoid daisy-chaining power strips or relying on several extension cords. Michigan’s guidance on residential growing electrical safety warns that overloaded equipment can create fire hazards, damage devices, and contribute to power outages.
Consult a qualified electrician when you are uncertain whether the circuit can safely support the equipment.
Restrict Access
Keep the growing area inaccessible to children, pets, and unauthorized visitors.
Store fertilizers, pH-adjusting products, tools, pest treatments, and harvested cannabis in secure locations. Leave chemicals in their original labeled containers.
Harvest, Dry, Cure, and Store Cannabis
Evaluate Maturity
Consider several signs rather than relying on one calendar date:
- Whether flower growth has substantially slowed
- Changes in visible floral hairs
- The density and development of the flowers
- The cultivar’s estimated flowering period
- Trichome appearance under magnification
- The overall condition of the plant
As flowers mature, many visible hairs darken and recede. Glandular trichomes commonly change from clear toward cloudy, while some eventually appear amber.
Inspect several flowers from different parts of the plant. No single visible change guarantees an ideal harvest date.
Check carefully for mold, decay, insects, or damaged tissue before cutting. Discard contaminated material instead of mixing it with healthy flowers.
Harvest Cleanly
Use clean cutting tools and a clean work surface. Keep harvested flowers away from floors, damp cardboard, and unclean household surfaces.
Dry in a Controlled Space
Fresh cannabis contains substantial moisture and should be dried in a dark, clean, secure area with gentle air exchange.
Do not aim a powerful fan directly at the flowers. The purpose is to prevent stagnant, damp air while allowing moisture to leave gradually.
Inspect the material each day. Musty odors, fuzzy growth, unusual discoloration, or persistently wet interior areas can indicate mold or uneven drying.
Cure Only After Drying
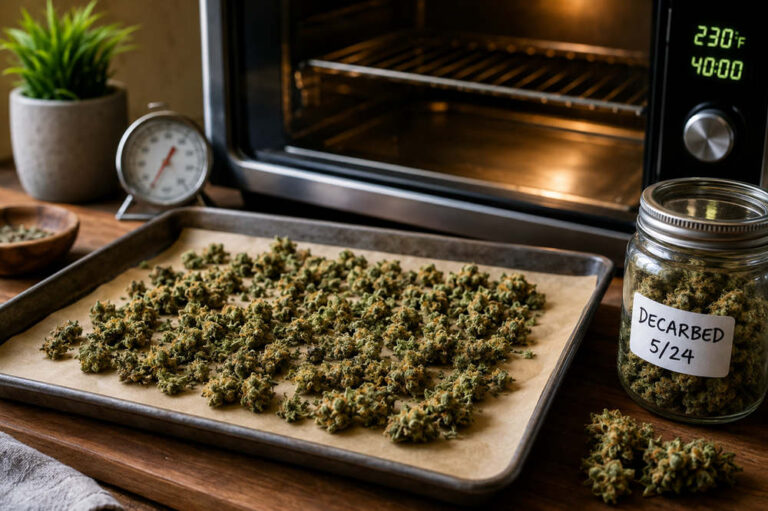
Curing is a separate postharvest stage commonly performed after drying. Research on cannabis postharvest handling identifies trimming, drying, curing, and storage as distinct parts of the process.
Do not seal flowers in containers while they remain wet enough to create condensation. Place sufficiently dried material loosely in clean containers and leave some air space.
Check the containers frequently during the early curing period. If the flowers feel noticeably damp again after enclosure, remove them temporarily for additional drying.
Discard anything that develops visible mold or a persistent musty odor.
Store Securely
Keep finished cannabis in clean, labeled containers in a cool, dark, dry location. Follow local possession and storage limits.
Health Canada’s safe cannabis storage guidance emphasizes keeping cannabis out of sight and reach of children and pets.
Consider Cost and Energy Efficiency
Indoor growing involves both startup purchases and continuing expenses.
Initial costs may include:
- A tent or room preparation
- A grow light and hanging equipment
- Fans, ducting, and odor filtration
- A timer and environmental monitor
- Containers and trays
- Growing medium
- Seeds or clones
Ongoing costs may include:
- Electricity
- Water
- Nutrients
- Replacement filters
- Heating, cooling, or dehumidification
- Pest management
- Drying and storage supplies
The stated wattage of the grow light does not represent the complete operating cost. A powerful fixture may also increase the need for ventilation or air conditioning.
Improve efficiency by:
- Starting with fewer plants
- Matching the light to the actual canopy area
- Using dependable timers and controls
- Cleaning fan blades, vents, and filters
- Measuring water and nutrients instead of guessing
- Recording electricity use
- Repairing leaks in the growing enclosure
- Correcting small problems before they spread
Do not expand the growing area until the existing setup is stable, safe, and easy to maintain.
Final Thoughts
A successful indoor cannabis grow begins with legality, household safety, and environmental stability.
Choose a manageable space, install only the equipment you need, and test the setup before planting. Once plants are growing, maintain a consistent routine rather than reacting to every minor change.
Water according to the growing medium, use fertilizer cautiously, inspect plants regularly, and pay close attention to moisture and electrical safety. As harvest approaches, evaluate several signs of maturity and allow enough time for careful drying and curing.
Stable conditions and gradual adjustments are more valuable than expensive equipment or complicated techniques.